Thank you for choosing our ELLIO: Threat List, your personal bodyguard in the realm of cybersecurity. Our tool creates a custom firewall threat list based on your network setup, giving you a smarter and more effective security solution. This guide will show you how to set up the ELLIO: Threat List, including some useful tips on how to use it efficiently.
Let's start securing your digital frontier.
#Requirements
To use our Threat List, you need a router or firewall that supports this feature.
If you have a device from pfSense, pfSense+, FortiGate, or PaloAlto Networks, you're halfway there!
Different manufacturers may call this feature by different names, such as External Threat List, External Dynamic List, or Dynamic Firewall Rules. If your router or firewall isn't on our list, let us know on our Slack. If you found the firewall/router that we do support, but do not have in the list, please let us know.
You can try our service with 2 deployments before you need to provide any credit card information. This gives you a chance to test its performance and compatibility with your network.
#Setup
Sign-up here. You'll need to confirm your email and log in.
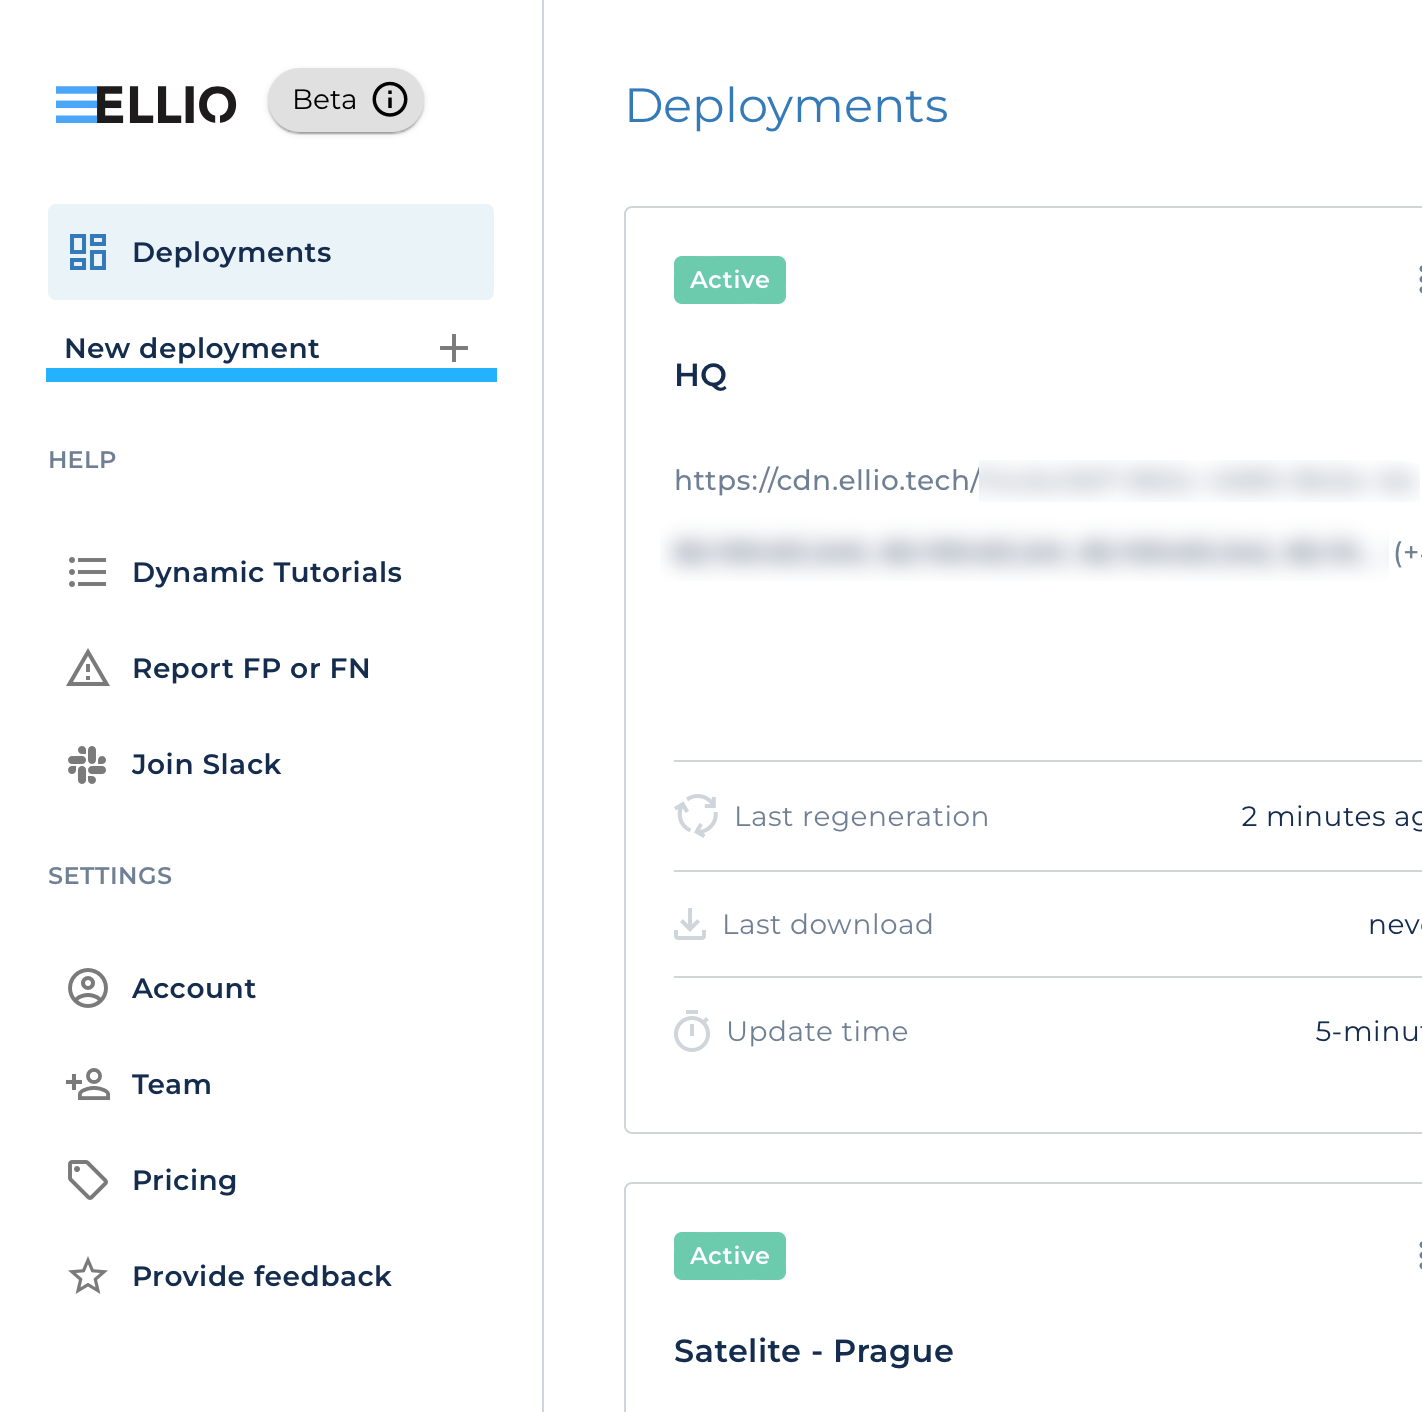
Inside your new workspace, click on the "New deployment +" button.
Follow these steps to set up a deployment:
Step 1: With firewall or router do you use?
Select the vendor/solution that you use as router and/or firewall. For example, if you are using Netgate Box, select pfSense, if you have FortiGate, select Fortinet.
Generic option
If you want to try the FTL and do not see a vendor of your solution, select pfSense as a generic provider.
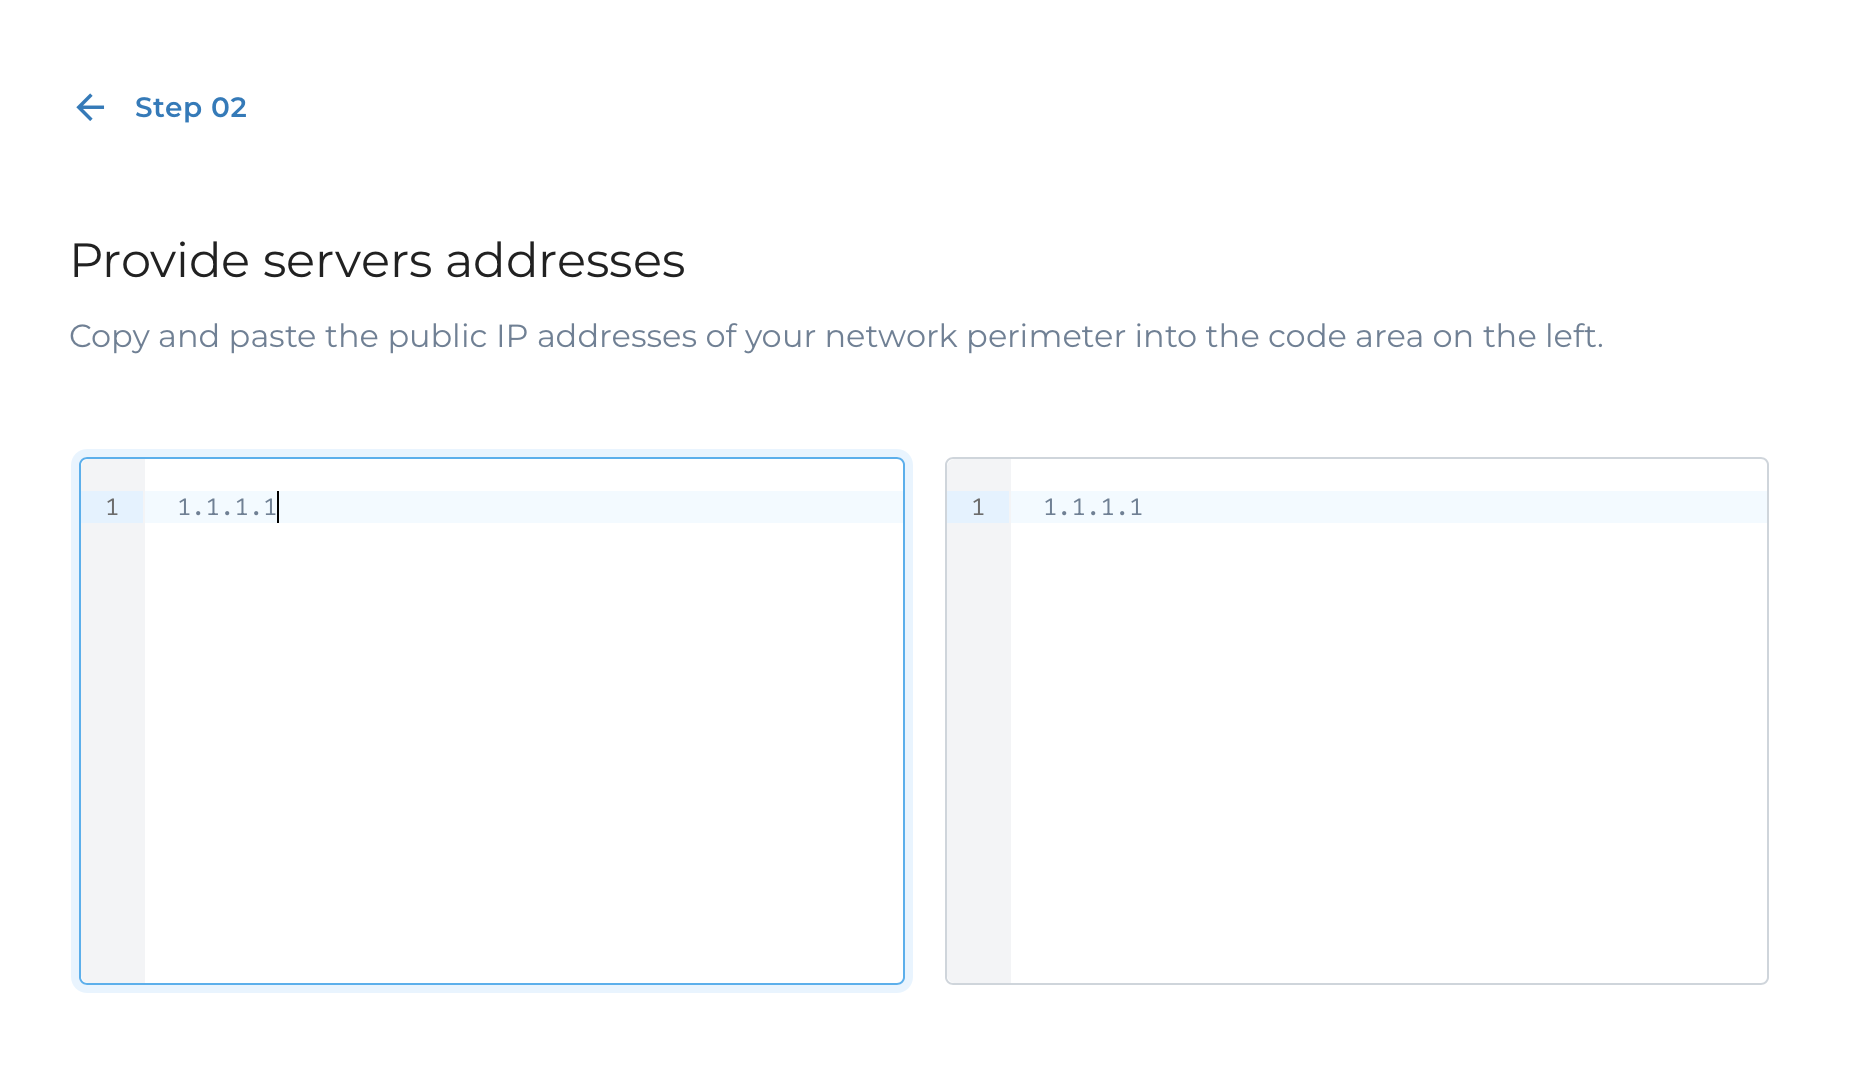
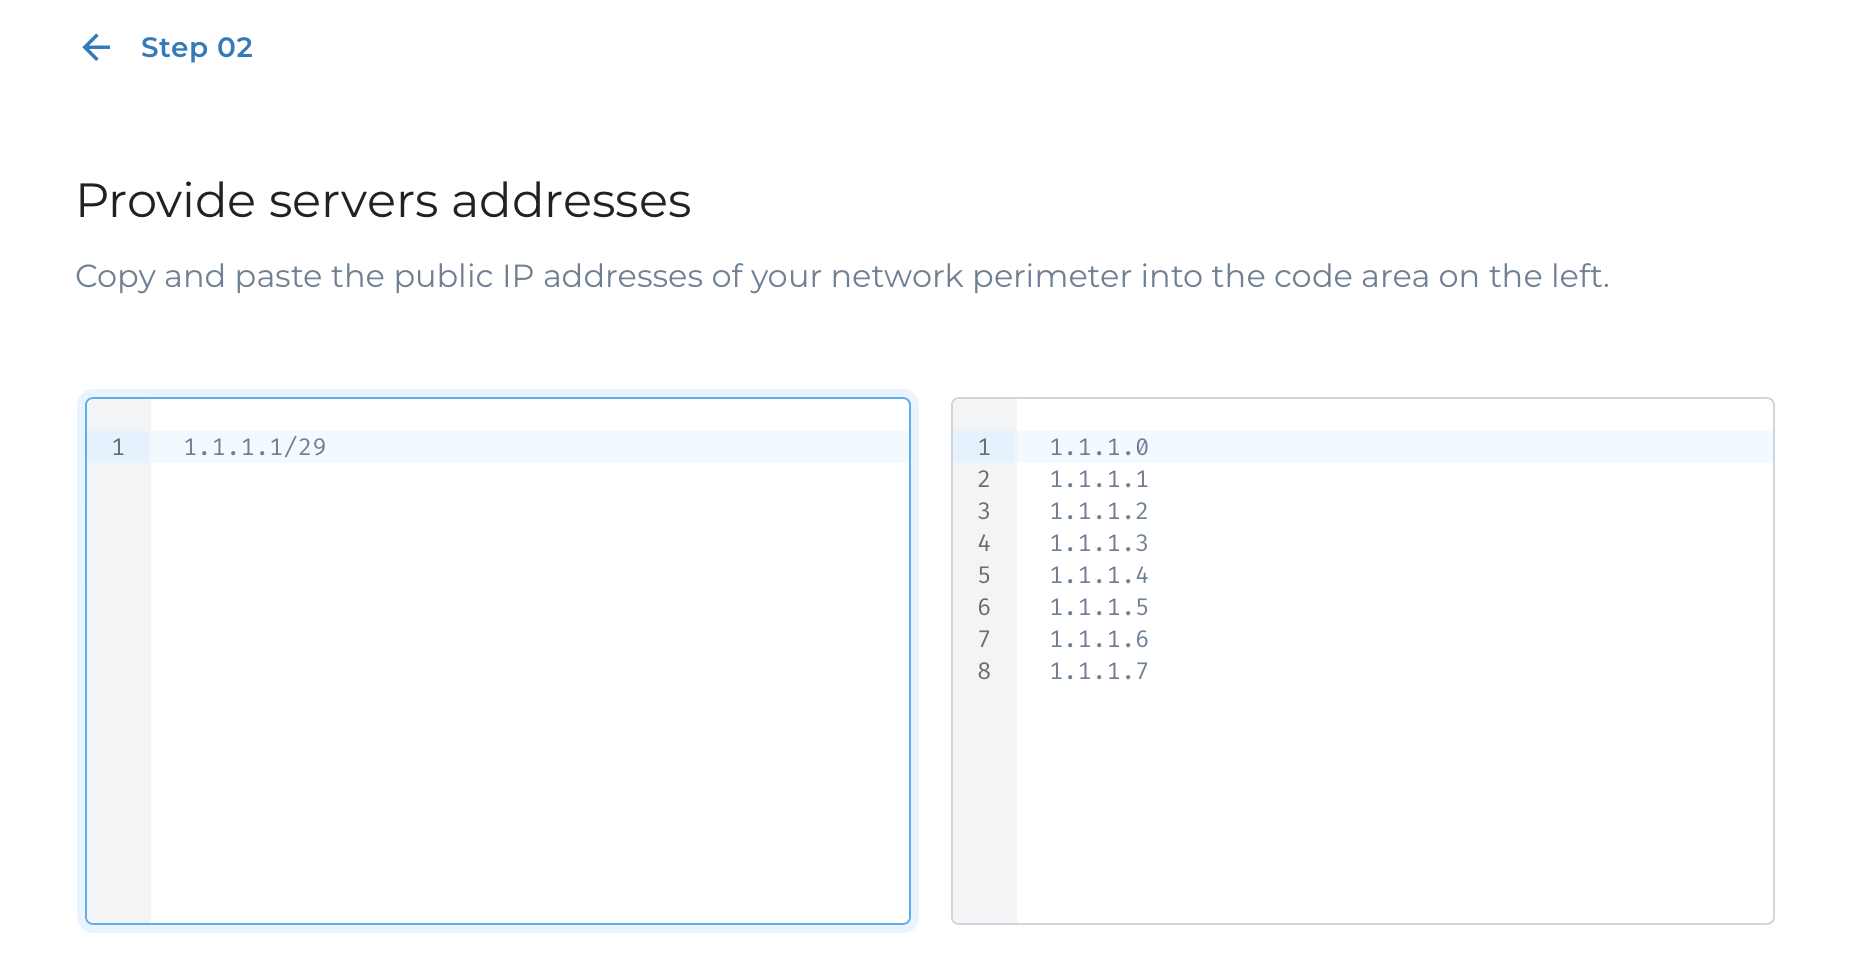
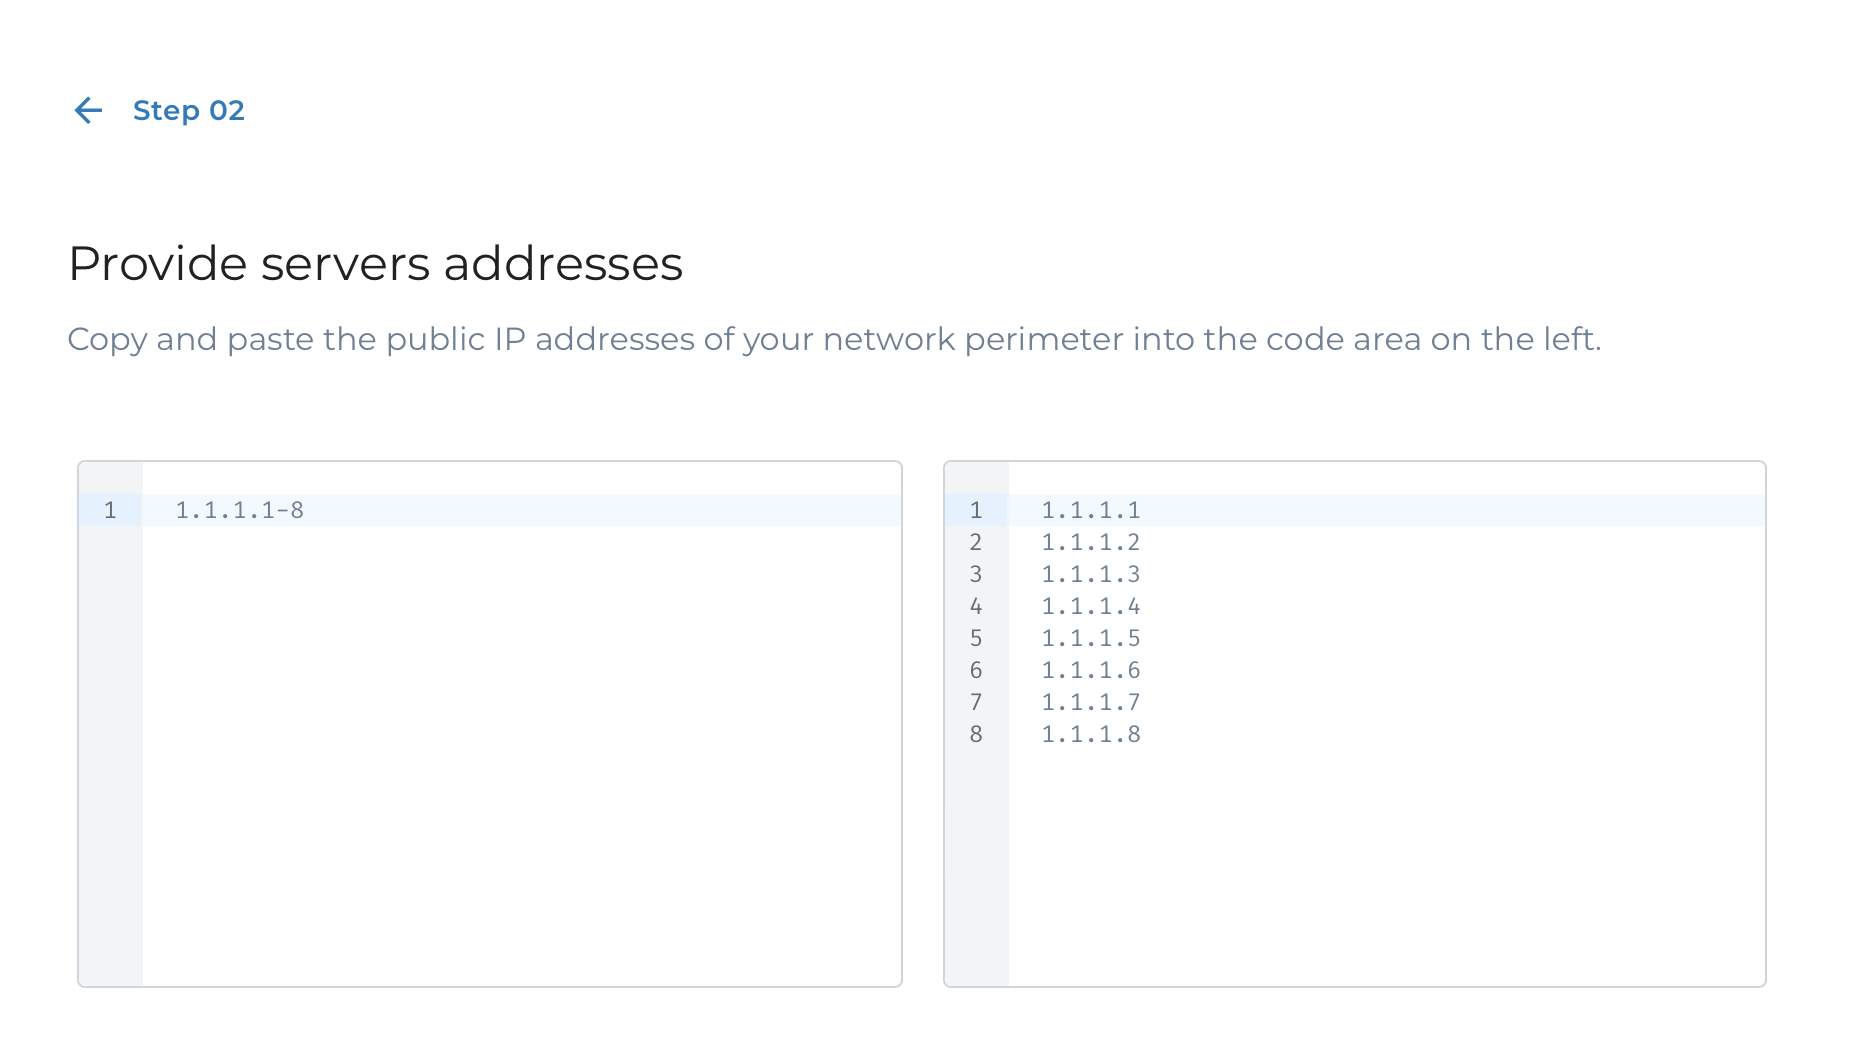
Step 2: Provide servers addresses.
Here, you need to enter the IP addresses of your network's edge servers. You can add up to 16 IP addresses per deployment. These will usually be the public IP addresses of your router or firewall. Check out the 'Perimeter' section of our FAQ for more information.
Perimeter
faq/perimeter/
Advanced input options
CIDRIP Range
You can provide the list, where each IP address is at new line, or use CIDR notation (up to /28) or IP ranges in the last octet.
Step 3: Services
This step will show you a list of open ports and service banners for your network. This helps you confirm the network perimeter you want to protect.
No open ports
If you have entered the IP addresses that we have not seen previously, it is quite possible that you will see the message There are no open ports for this IP address.
Don't you worry, in that case our backend already have scheduled the scan of your perimeter.
Step 4: Confirmation
On that page you should see a confirmation of successful deployment creation as well as the link to your personalized Threat List.
Depending on the Tier, it will be updated every 5 minutes or every hour. By clicking on "Dynamic Tutorial" button next to the link, you will be redirected to the setup tutorial for your specific solution.
Be sure to check them our.
#Configuration
To use your Threat List, you'll need to:
Apply the rules from the Threat List to incoming internet traffic on your firewall or router.
Set up your firewall or router to automatically download the updated rules from the Threat List every so often.
For vendor specific configuration tutorial, click here
#Monitoring
Each of your deployments comes with a dashboard that has two tabs:
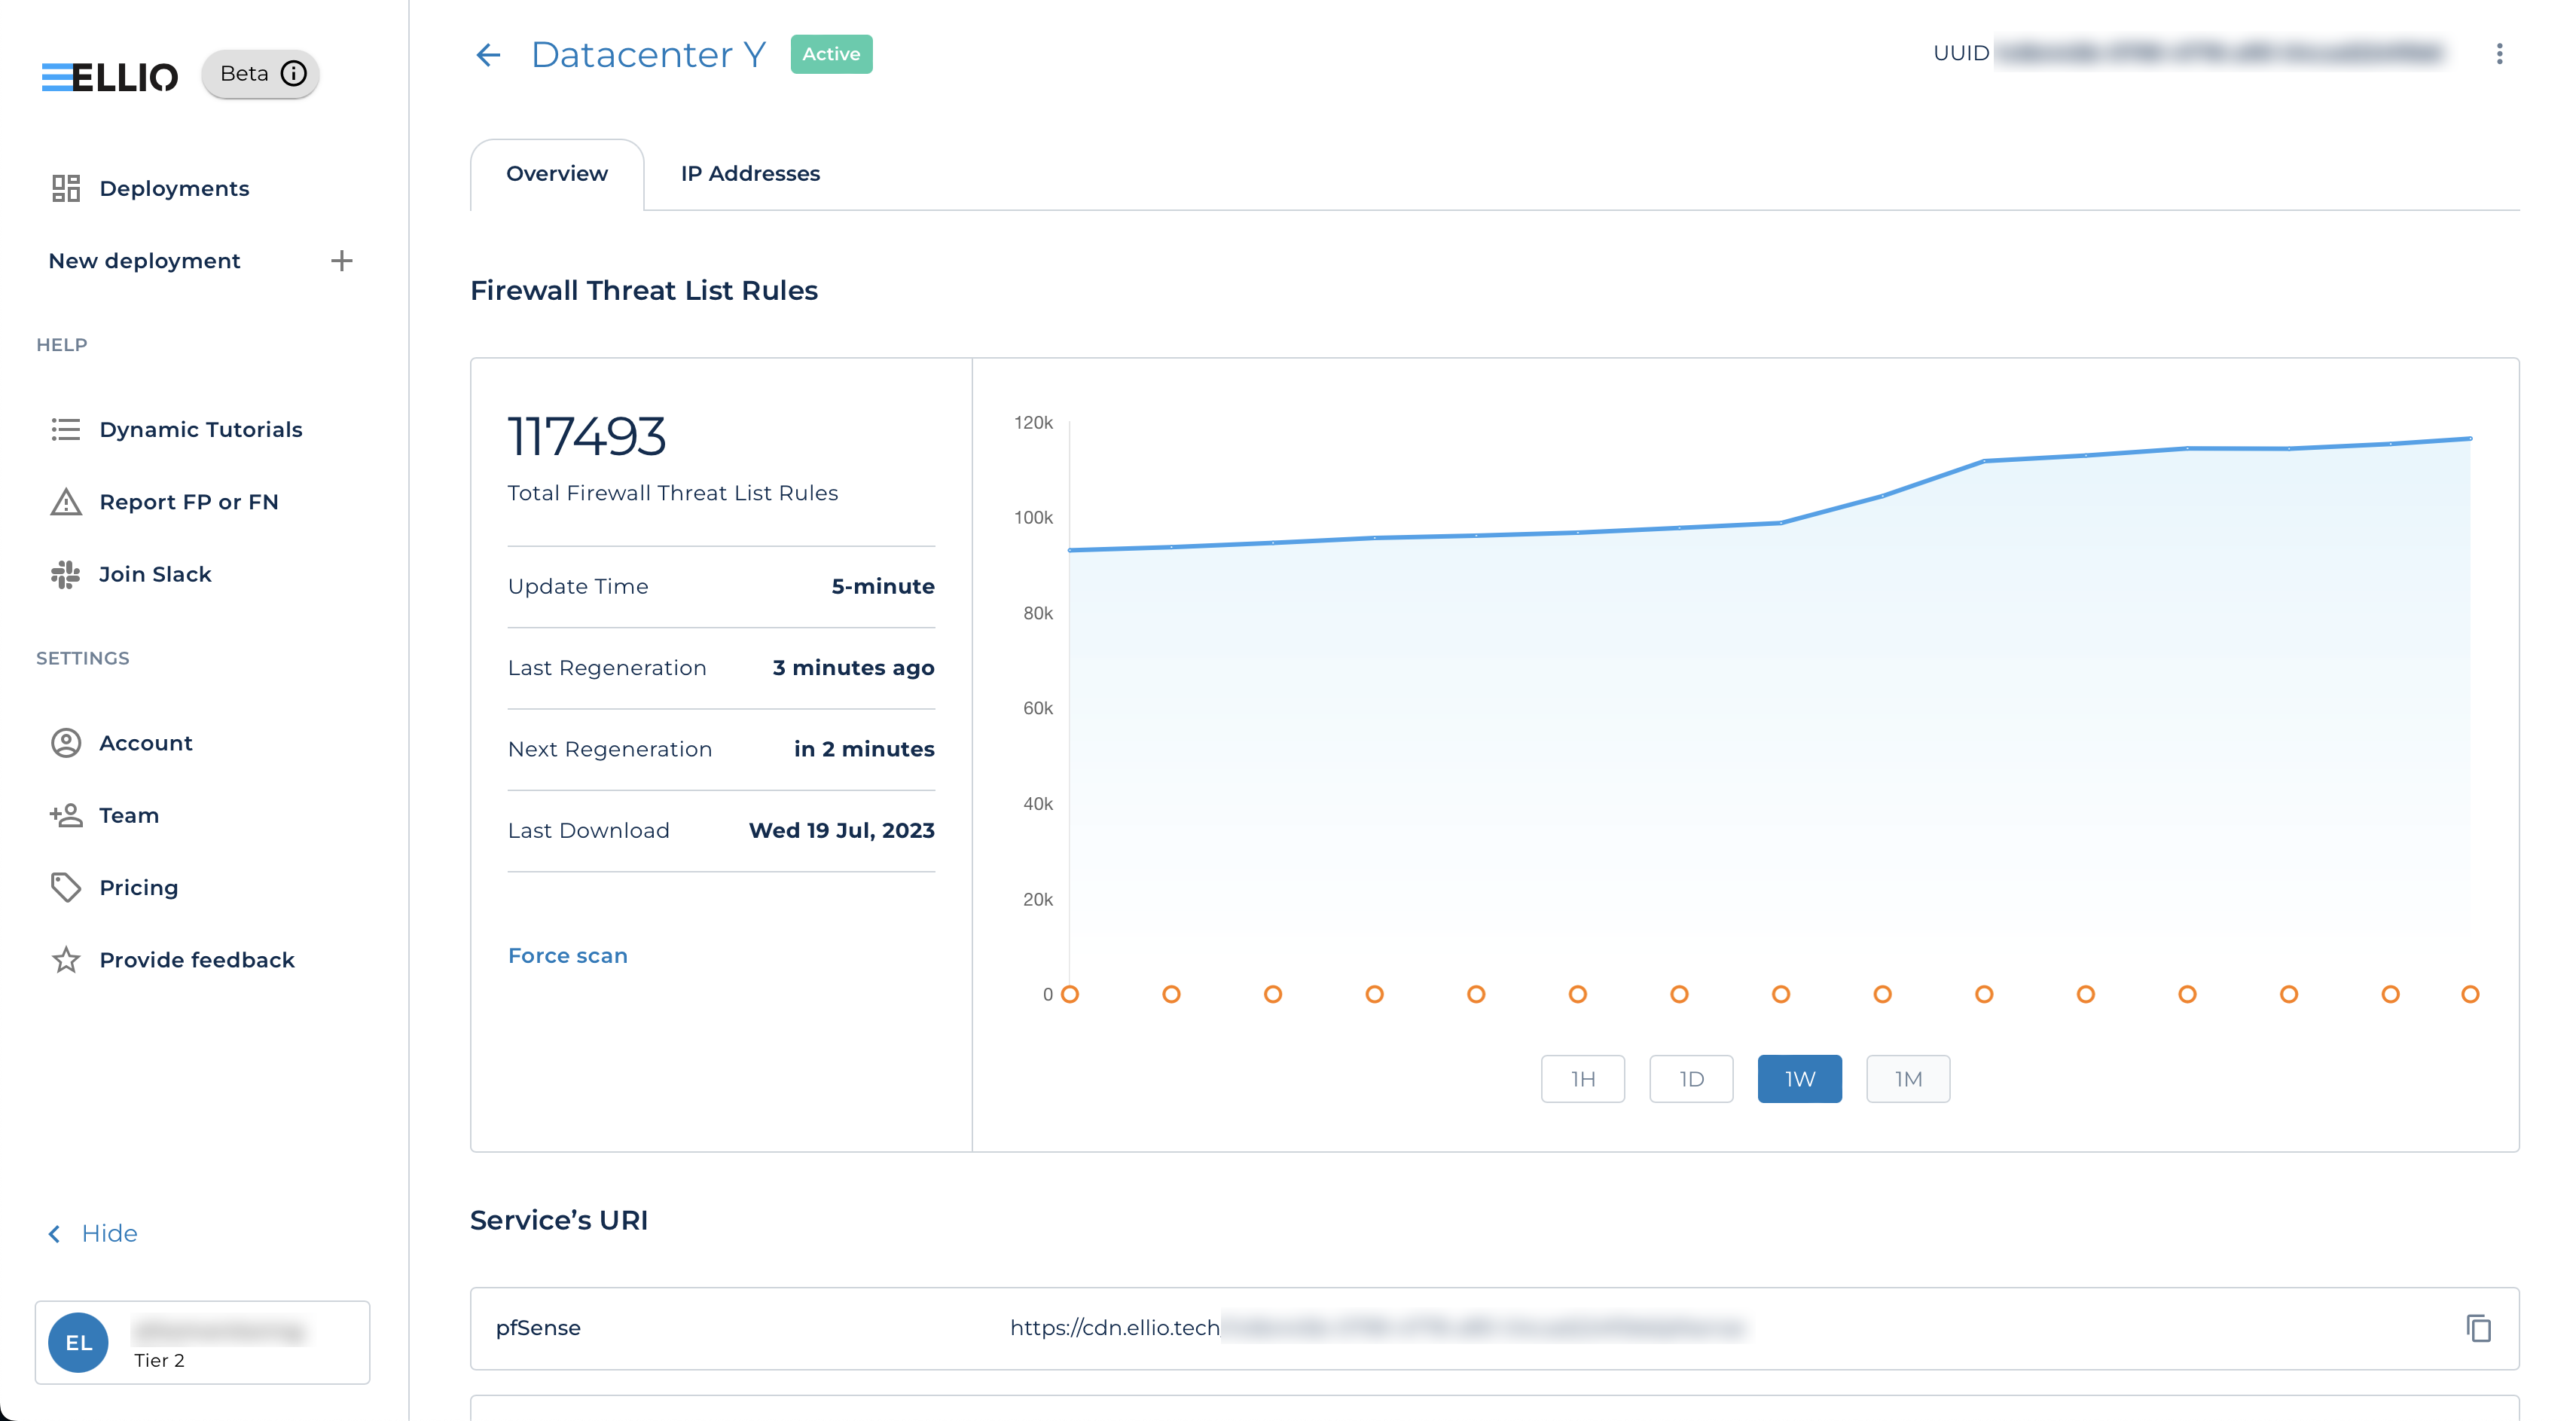
Overview
Deployment overview
Overview tab allows you glance over the amount of rules in the FTL for your perimeter as well as statistics about the rule list download by your firewall.
On the chart, orange dots are the download events. This way you can check how ofter your solution downloads the Threat List.
The blue line is the number of rules in your Threat List at any give time.
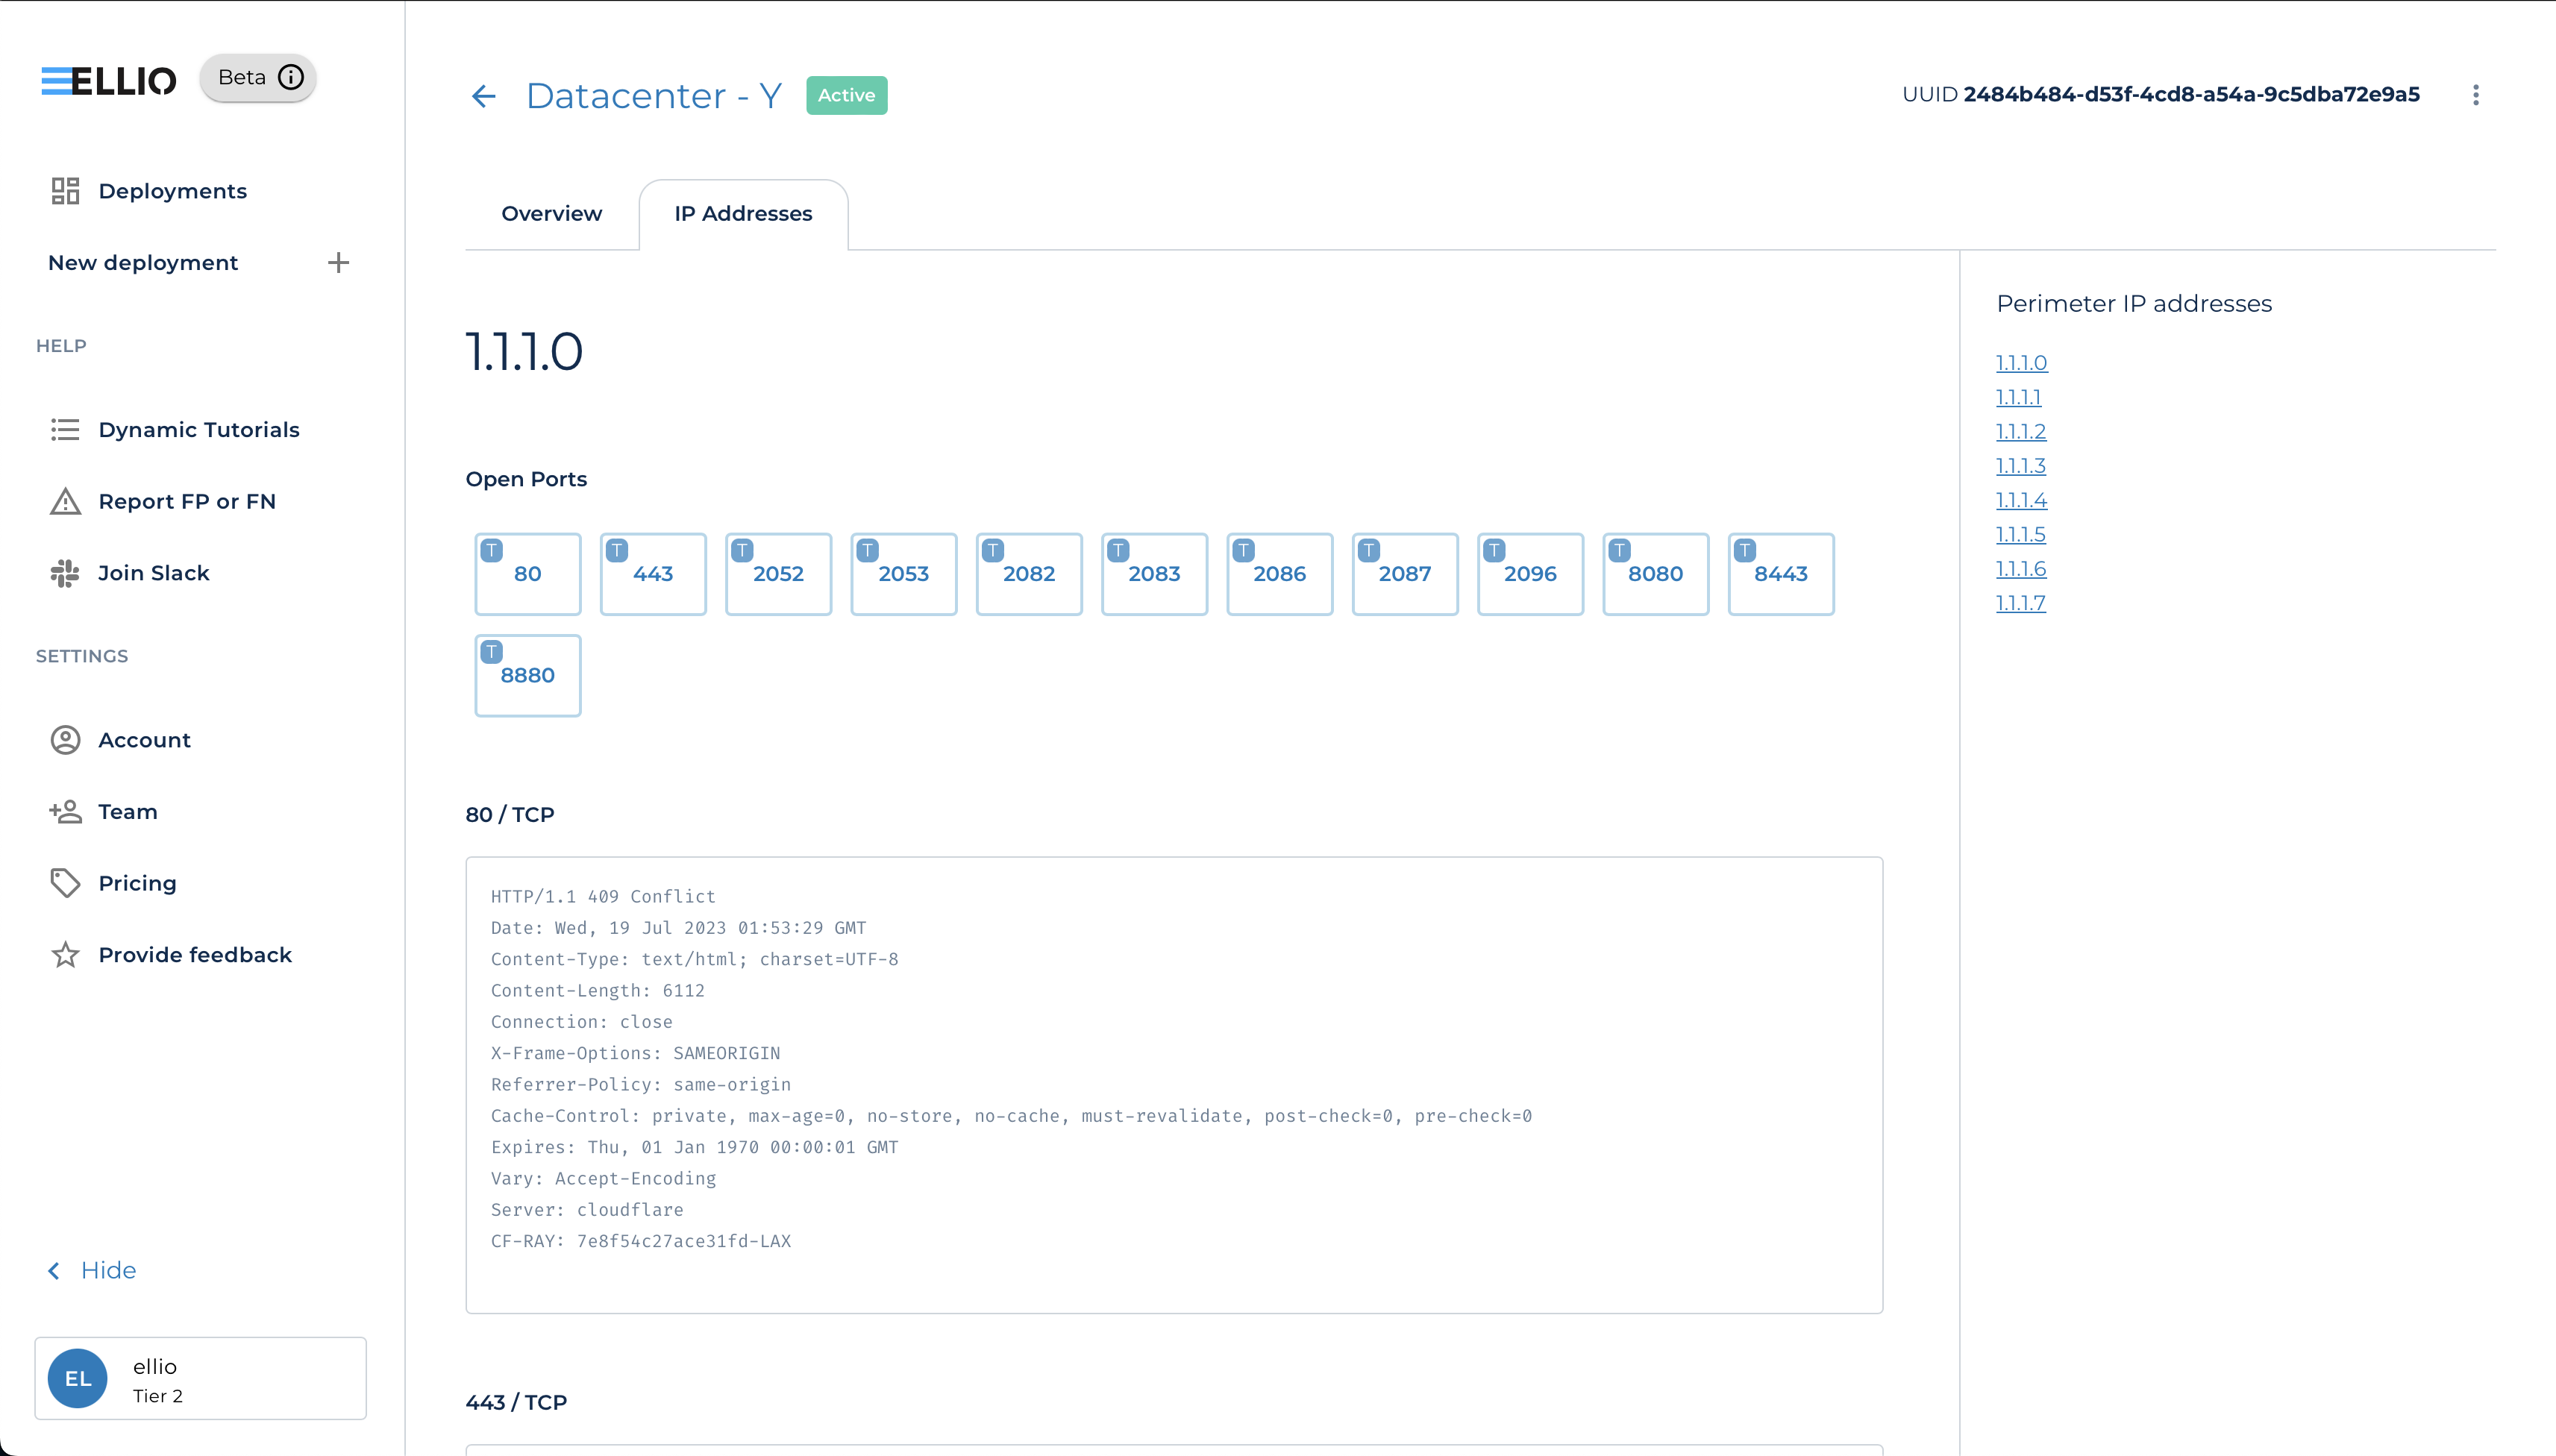
IP Addresses
Perimeter overview
IP Addresses or perimeter stats allows you to monitor how ELLIO:FTL sees you perimeter. Here you can check basic information, like opened ports and banners on all the IP addresses in your deployment.

 Here, you need to enter the IP addresses of your network's edge servers. You can add up to 16 IP addresses per deployment. These will usually be the public IP addresses of your router or firewall. Check out the 'Perimeter' section of our FAQ for more information.
 This step will show you a list of open ports and service banners for your network. This helps you confirm the network perimeter you want to protect.
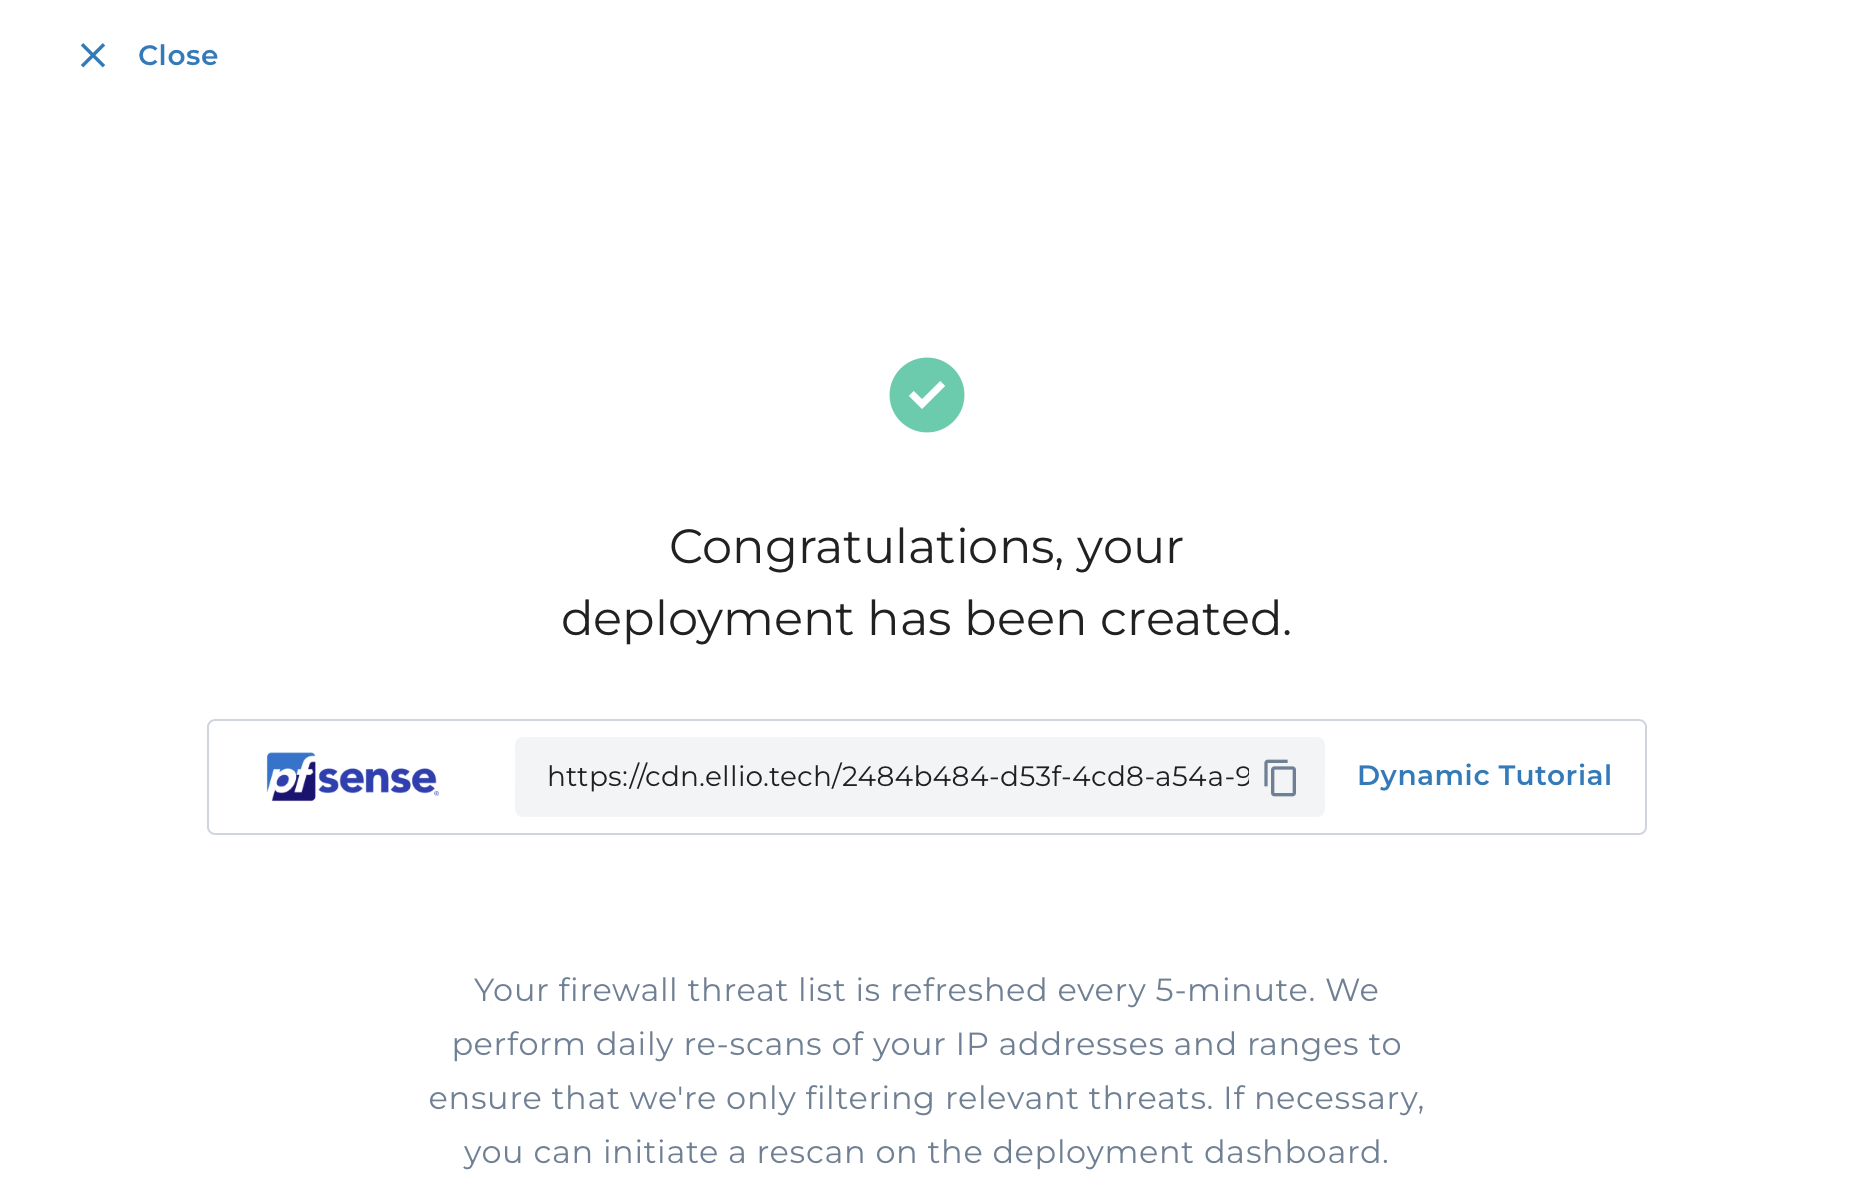 On that page you should see a confirmation of successful deployment creation as well as the link to your personalized Threat List.
Depending on the Tier, it will be updated every 5 minutes or every hour. By clicking on "Dynamic Tutorial" button next to the link, you will be redirected to the setup tutorial for your specific solution.
Be sure to check them our.
On that page you should see a confirmation of successful deployment creation as well as the link to your personalized Threat List.
Depending on the Tier, it will be updated every 5 minutes or every hour. By clicking on "Dynamic Tutorial" button next to the link, you will be redirected to the setup tutorial for your specific solution.
Be sure to check them our.